Sunday, August 30, 2015

How-To: Video on MyLink

How-To on getting VIDEO to work on Mylink

There has been a lot of confusion and speculation about things with the mylink its hard to find information on what exactly needs to be done... some people claim to have gotten this to work, but fail to show how to do it, or video of it actually working. This is going to show both.

Things you will need
  1. USB Flash Drive
From MyLink
  1. Click Home, Click Settings, Scroll down to the bottom click DIVX VOD Registration
  2. On the popup screen write down your Registration code (triple check the code) and the website which is http://vod.divx.com
From Computer
  1. Goto http://vod.divx.com
  2. Create an account
  3. Click register device
  4. Type in your code name it MyLink (can probably name it whatever) (check code 3 times)
  5. Click Register
  6. Download the registration file
  7. Copy the file to your USB Flash Drive
From Mylink
  1. Plug USB Flash Drive in (Upper Glove Box)
  2. Click Home
  3. Click Pictures & Video
  4. Registration Video should now be playing.
Your MyLink is now registered to play DIVX Video Files

Errors: 
  • ERROR: If when you go to play the registration video you get an error like Your device is not Authorized to play protected files.
  • SOLUTION: Remember when I told you to triple check your code.... Check it agian.
Getting files in the right format for playback on MyLink

From Computer (NOTE: I did this on windows 10 others OS may differ slightly)
  1. Goto http://www.divx.com/en/software/divx (works on windows/mac)
  2. Download DivX Converter
  3. Install DivX Converter
  4. Open DivX Converter
  5. Skip intro about buying video pack (don't need it)
  6. Drag and Drop Videos onto the main screen
  7. At the top were it says Select output profile Select DivX Home Theater
  8. Bottom Right, Click [...] next to Output Folder and Select your USB Flash Drive
  9. Click Start
  10. Once finished you are good to test the files on your MyLink
  • NOTE: This will NOT allow video in motion, over 5 mph video will cut out.
I tested 19 random music videos downloaded from the internet, all worked with the above setup.

Saturday, August 22, 2015

Getting Started with EFILive and Autocal!

Video tutorial getting started with EFILive and Autocal.

Thursday, August 20, 2015

D.I.Y. - Honda 99 - 00 Mugen Style Front Lip - By Omar Lopez

D.I.Y. - Honda 99-00 MUGEN STYLE Front Lip
So you just bought your damn smexy Honda mugen lip. Gotsss to get that sex on now. So hopefully you could do this with this help. Works BEST on LS LT and LTZ. iam not responsible for this thing falling off, messing up your front end up, ect ect. Work at your own risk. This will make you super angry when working on it.
Step: 1 Cut off the small tab on the upper part of the lip to keep it nice a straight for when it goes on the car.

When on car it should sit “flush with body”

Step: 2 m3 tape the whole inner part of the lip.
*Pic is not the proper lip just an example of what should be done. *
Step: 3 we are now outside near the car. line the lip up with the body on either the passenger wheel weld side or driver wheel weld side. The stock rubber lip should be just a tad bent. But lip should cover most.

Step: 4 we are now drilling in two holes on the side you chose to work on first.
Also add your screw of choice and washer of choice. Would recommend some good long wood screws, and a fat washer head, to make sure it stays in.

Step: 5 we now SKIP THE MIDDLE go to the opposite side. Ex *If you started on driver, go to passenger* and again repeat with the same two holes

Step: 6 now take off the red m3 tape cover.
Step: 7 Now we sit at the MIDDEL of the car. and now lift the full lip up. So it should look like its fully on. Have someone or something hold it for you at this point. To let the m3 tape fully stick on.
++As you are now waiting for the m3 tape to stick continue on and work on the next steps as someone or something holds the Honda lip up. ++
Step: 8 now UNDER the car starting at the passenger side. ADD on L shape bracket. Drill up to the front Sonic bumper and drill through the Honda lip. Once again use some hard core screws and washers.
Total of 2 screws 1 bolt and 1 nut. Two going up in the sonic front bumper and one screw with bolt going trough the honda lip.

Step: 9 Now at the MIDDEL of the car two more of these L brackets go on.
Total 4 screws 2 bolts and 2 nuts. Screws go through the under half of the sonic front bumper and bolt with nut go through the Honda lip.
*these brackets are bent because I can’t drive and curbed it…..*
Step: 10 just simply repeat step 8. 2 screws go trough the under half of sonic front bumper and 1 bolt and nut trough Honda front lip
Step: 11 WE almost done finally. Go ahead and recheck the full lip to make sure its not crooked, or any gaps show, if so pull the lip up higher and redrill again.
Should sit up with almost two finger gap with the body line.

Step:12 Paint the lip with color of choice if you choose too, or paint the screws heads so they aren’t too noticeable
You are now fully done with the look and enjoy ! iam not responsible for this thing falling off, messing up your front end up, ect ect. Work at your own risk. Hopefully this helps or gives an idea on how to install the Honda mugen style front lip.
If you wants to buy it here is the link

Tuesday, August 4, 2015

D.I.Y. - Custom Dead Pedal - By Richard DeFries

D.I.Y. - Custom Dead Pedal


1. Gather Your Tools / Parts - 22 GA Stainless Steel / Aluminum Sheet - Tin Snips / Cutting Wheel - Drill - Drill Bits - Template - Bead Roller / Coining Hammer - Safety Step / Non Slip Mat - Rivet Gun - Rivets - Razor Blade - Industrial Grade Velcro - Bench Vice / Bench Edge - Paint (Optional)

2. Get A Random Section Of Card Board And Make A Template (Ref Pic 1) I've Added Measurements For The Flat Surfaces 


3. This Template Will Work For A Non - Rolled Edge Model If You Chose To Roll The Edge Over Cut This Template .25 Inches And Roll Access Material With A Bead Roller Or Coining Hammer. Your End Goal If You Are Rolling The Edges Is To Have A Finished Surface To Match The Template (Ref Pic 2) This Is Template Size Matched Using A Coining Hammer. A Tad On The Ruff Side But I Normally Don't Do Metal Work


4. Once You Have Your Template Cut Out Finished Or Finished Rolling The Edges The Template In Pic 1 Has 3 Long Lines In It Where You Want To Put A 90° Bend Into Your Metal Dead Pedal (Ref Pic 3)


 5. At This Time If You Chose To Paint You Dead Pedal Do So Now. Grab You Safety Step / Non Slip Mat And Cut A Section With Your Razor Blade To Fit The Dead Pedal It Should Have A Adhesive Backing But Wont Hold Up To Daily Use Stick It To Dead Pedal Metal. Now Using A Drill Select Locations You Would Like To Drill Holes For Your Rivets I Did About Every 1.50 Inches Per Rivet (Ref Pic 4) Also Is You Wanted To Get Fancy With Your Razor Blade You Can Cut Designs Into The Safety Step / Non Slip Mat (Ref Pic 5) But I Will Say It Wont Hold Up Very Long 


6. You May Have You Use A Hammer Or Cut Off Wheel To Flatten / Shave The Underside Of The Rivets Down. Then Apply The Non - Felt Side Of You Industrial Velcro On The Bottom 1 Piece Per Side Usually Comes In 2 x 4 Inch Pads

7. Your Dead Pedal Is Now Complete Go Install It And Remember To Press It Down A Bit And Give It A Shake To Get The Velcro To Grab The Carpet Fibers (Ref Pic 6)


8. Sit Back And Enjoy Your Hard Work!

Monday, August 3, 2015

D.I.Y. - Automotive Detailing - By Richard DeFries

D.I.Y. - Automotive Detailing

Interior -

Items Needed - Glass Cleaner - Interior Cleaner - Leather Cleaner - Leather Conditioner - Leather Sealer - Vacuum - Micro Fiber Clothes - Carpet / Upholstery Cleaner

1. Start From The Top And Do Your Glass I Usually Do My Sun Roof Glass And Rear View Mirror First. Then I Finish The Remaining Windows

2. Once The Windows Are Finished Move Down And Start Cleaning Your Dash Board And Center Console Then Work Your Way To The Door Panels

3. Once That Is Done If You Have Leather Use Your Leather Cleaner Then Conditioner Then Sealer In That Order And Give Each Item A Bit Of Time To Set In. Also Never Spray Leather Products Directly Onto The Leather EVER It Will Stain And Discolor The Leather.

4. After You Have Completed The Leather Process You Can Remove Your Floor Mats And Clap Them Semi Clean Then Vacuum Them Out And Set Aside. Then You Can Start With Your Seats Then Push Your Front 2 Seats All The Way Back And Clean Your Floor Pans Once Completed Up Front Move Both Front Seats All The Way Forward And Start Vacuuming The Back Seats Then Floor Pans. And Finally The Trunk / Hatch

5. This Would Also Be A Great Time To Deal With And Stains Or Spots On Your Seats / Carpet. Get Your Carpet / Upholstery Cleaner And Get To Scrubbing If You Have A Wet / Dry Vacuum It Will Greatly Reduce Your Drying Times

6. Finished Interior (Ref Pic 1 - 3) Sorry For Potato Cam Pictures


Exterior -

Items Needed - 2 Buckets - Wheel Well Brush - Tire Brush - 2 Sponges Or 2 Cleaning Mitts - Car Wash Soap - Clay Bar Kit - Wax Of Preference - 2 Wax Applicators - 8 Micro Fiber Clothes - Large Terry Cloth Towel - Spray Wax Of Preference - Ultra Cut Or Swirl Remover - Bug / Tar Remover - Bleach White Or Tire & Rim Cleaner Of Preference  - Metal Polish - Shammy Or Water Blade - Plastic Restore / Shine - Tire Gel - Tire Gel Applicator


1. Start By Wetting Your Entire Car And Letting It Sit While You Fill Your Buckets With Your Cleaning Solutions 

2. Then Start To Clean Your Rims First Start By Spraying On Your Rim / Tire Cleaner Also Throw A Bit Of Tire Cleaner In Your Wheel Wells And Use Your Wheel Well Brush To Give Them A Good Scrub Then Use The Tire Brush To Give The Tires A Good Scrub Also. Now To The Rims Use Your Sponge (DO NOT USE THIS SPONGE ON YOUR PAINT!) To Give Them A Good Wipe Down Finally Spray Them Off.

3. Then Start By Re-Wetting Your Entire Car Again And Go Around The Car And Look For Tar And Bug Build Up And Spray Those Spots With The Bug / Tar Remover Let That Set In 

4. Then Get Your Car Wash Soap Bucket Nice And Full Of Suds Grab Your Sponge And Start From The Top And Work Your Way Down. Remember To Dunk Into You Car Wash Soap Bucket Frequently. 

5. Once Completed Spray Your Car Down To Remove The Dirt And Left Over Suds Now Open Up Your Clay Bar Kit And Go Over The Entire Car With That (Very Time Consuming But So Worth It ) Also Remember To Keep The Car Wet During This Process.

6. After You Finish You Will Go Ahead And Shammy / Water Blade Your Car Dry And Use The Large Terry Towel And Open Each Door And Wipe Down The Door Jams If You Want Them To Look Really Good Use Your Spray Wax And Micro Fiber Towel At This Time 

7. At This Time Walk Around Your Car And Look For Minor Paint Imperfection Like Swirls Or Fine Scratches And Use A Micro Fiber Towel And Ultra Cut To Hand Buff That Area Clean

8. After That You Will Start To Wax Your Entire Car I Usually Use 2 Applicators When Doing This Get Everything Waxed And Allow Time To Haze Up. (DO NOT DO IN DIRECT SUNLIGHT) Bust Out Your Micro Fiber Towels And Buff The Wax Off By Hand. Make Sure To Snap Your Towel Clean About Every 1 SQ FT Of Area Cleaned Off

9. Once All The Wax Is Removed Go Around Your Car And See If You Hit Any Of Your Trim With Wax And Use Your Plastic Restore To Bring It Back To Black And Shiny

10.  After That Use Your Large Terry Towel To Wipe Down Your Rims And Put Some Tire Gel / Shine On Your Tires.

11. Then To Your Exhaust And Use Your Metal Polish To Clean It Up And Then Wipe It Down With Your Terry Towel.

12. If Any Towel / Shammy / Rag Touches The Ground THROW IT OUT Do Not Use It On Your Paint EVER.

13. In Process & Finished Exterior (Ref Pic 4 - 15)


Under Hood -

Items Needed - Plastic Restore / Shine - Spray Wax - Micro Fiber Clothes - Shop Rags 

1. Pop You Hood And Start By Using Your Plastic Restore / Shine On The Front Cowl , Windshield Cowl , Fuse Box , Engine Head , Battery / Battery Tray , Hose And Wire Looms

2. If You Have Any DDM Works Painted Heat Shield Or Coil Covers You Can Use Spray Wax On Them And The Jam On Your Hood 

3. Finished Under Hood (Ref Pic 16 & 17)


Sit Back And Enjoy Your Hard Work!


D.I.Y. - ZZP Front Mount & DDM Works Silicone Charge Pipes - By Richard DeFries

D.I.Y. - ZZP Front Mount & DDM Works Silicone Charge Pipes 

1. Gather Your Tools / Parts -  Assorted Sockets - Assorted Ratchets - Assorted Extensions - T20 Torx Socket - Creeper - Jack - Jack Stands - Flat Head Screw Driver - Vice Grips - Dremel (Optional) - Shop Rags - ZZP Front Mount - DDM Works Silicone Charge Pipe Kit - 3 x Small Jars / Bins 

2. Park Your Car . Engage Your Parking Brake / E - Brake . Chuck Your Rear Wheels . ! Safety First !

3. Jack Up The Front Of Your Car And Place Your Car On Jack Stands. Pop Your Hood And Start Removing The 6 Push Clips And 4 10 MM Bolts From Up Top. Place Everything Removed Into Jar / Bin #1 Under Hood . Then Remove The 4 T20 Torx Screws In Each Wheel Well. Place Everything Removed Into Jar / Bin #2 Wheel Wells (Ref Pic 1 & 2) After That Under The Front Bumper You Will Have 2 14 MM Bolt , 6 Push Clips , And 4 T20 Torx Screws To Remove. Place Everything Removed Into Jar / Bin #3 Underbelly


4. Once You Have Removed All The Hardware Holding Your Bumper In Place Comes Now The Fun Part Pulling Toward The Front Of Your Car And Shaking You Should Be Able To Remove The Front Bumper From The Fender Clips Without Breaking A Singlet Tab (Ref Pic 3) Make Sure To Remove Slowly As You May Have 2 Fog Light Wires To Disconnect And A Sensor In The Front Bumper To Disconnect Once Removed Set Off To The Side


5. Remove The Crash Bars 4 14 MM Bolts And Set The Bar To The Side Then Use Your Flat Head Screw Driver To Remove The 4 Push Clips From The Front Mount Shroud And Set To The Side (Ref Pic 4)


6. Detach The Plastic Slide Cips From The Charge Pipes That Hold Them To The Front Mount Then Remove The C Rings And Detach Your Charge Pipes From The Front Mount Then Remove The 11 MM Bolt From The Front Mount Then On The Passenger Side You Will Have A Push Tab To Release The Front Mount. Then Rock The Top Half Toward The Front Of The Car And Pull Outward To Remove The Front Mount. Set The Old Front Mount To The Side

7. Remove The Hose Clamp From The Bottom Of The Turbo And Remove The Hot Side Of The Factory Charge Pipes. Then Remove The Hose Clamp From The Throttle Body And Stuff A Clean Rag Into The Throttle Body Just For Peace Of Mind. Now From Under The Car Remove The 2 x 13 MM Bolts Holding The Plastic 90° Sensor Pipe In Place And Remove The Sensor. Now Remove The Cold Side Of Your Charge Pipes. Also When Removing The Cold Side 90° The Bolts Have Slide Washers They Sit In DON'T LOSE THOSE!

8. The Factory Hose Clamps Are Pressure Set And I Had To Break Mine Off I Would Suggest Using Vice Grips To Remove Some Of The Tension And A Flat Head Screw Driver To Break Them Free (Ref Pic 5) Or You Can Use A Dremel With A Cutting Wheel To Cut Off But Be Careful. Once You Have The Pressure Set Hose Clamps Removed From The Metal Hot Side 90° Pipe And Cold Side Plastic 90° Pipe You Can Start Installing Your DDM Works Silicone Charge Pipes But Don't Tighten The Provided Hose Clamps Yet

9. Now You Can Install The ZZP Front Mount Insert The Bottom Half On The Front Mount First Make Sure The Bars Fit Into The Guides And Then Rock The Top Half Up You Should Hear It Click Into Place Now Reinstall The Factory 11 MM Bolt (Driver Side) And ZZP Supplies You With Another Bolt To Install On The Passenger Side (Ref Pic 6)


10. Start Fishing Your DDM Works Silicone Charge Pipe Through The Lower Fender Don't Be Afraid To Bend Them A Bit To Get Them All Set In Place Then Tighten All The Supplied Hose Clamps. Remove The Rag From Your Throttle Body And Attach The Upper Charge Pipe And Tighten The Hose Clamp (Ref Pic 7). Reattach The Plastic 90° Pipes 2 x 13 MM Bolts And Reattach The Sensor (Ref Pic 8) Then Install The Charge Pipe Onto The ZZP Front Mount (Ref Pic 9) Just For Peace Of Mind Give Every Pipe A Little Tug To Make Sure You Snugged Up All Your Hose Clamps And You Will Notice The DDM Works Charge Pipe Are Flared To Mate With The Factory Intercooler They Are A Bit Big For The ZZP Front Mount You Will Have To Push Them On Quite A Bit And Tighten Them Farther Down.Or Cut The Flares Off Which I Chose Not To Do


11. Install Your DDM Works Charge Pipe To The Passenger Side Of The ZZP Front Mount And Tighten Down Your Clamp (Ref Pic 10) Then Install Your Lower Turbo Pipe Section And Tighten Your Hose Clamp (Ref Pic 11) And Then Give Them A Little Tug To Make Sure Everything Is Tightened


12. Now Reverse Steps 3 - 4 - 5 (The Front Mount Shroud Will Not Be Reinstalled)

13. You Will Notice Reinstalling The Front Bumper Will Be A Bit Snug And Take Some Minor Pushing To Get Things To Line Up Properly

14. Sit Back And Enjoy Your Hard Work!

D.I.Y. - Brad's Visor Clean Up & Painting - By Richard DeFries

D.I.Y. - Brad's Visor Clean Up & Painting

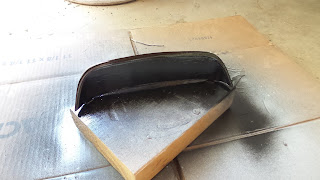
1. Gather Your Tools / Parts - 150 & 1500 Grit Sandpaper - Paint (Color Of Preference) - Plastic Primer - Clear Coat - 3M Double Sided Foam Tape - Rubbing Alcohol - Micro Fiber Towel

2. Sand Smooth With 150 Grit Sand Paper. Then Sand Again With Your 1500 Grit Sand Paper To Make It Really Smooth. (Ref Pic 1 & 2)


3. Once Smoothed To Your Liking Wipe Down With Rubbing Alcohol & Micro Fiber Cloth To Remove Any Debris

4. Now Use Your 3M Tape To Mount The Visor Up Right. Cut A Small Piece And Fold It Over To Raise The Visor Up A Bit

5. Once Mounted & Stable Spray Your Primer (Ref Pic 3) Let The Primer Dry For About 1 Hour Before You Start Painting.

6. Once The Primer Dries Start Laying Down Your Paint In Nice Even Coats 6 - 8 Inches Away. Lay Down 2-3 Coats Of Paint Allow 15 Mins Of Dry Time Between Coats ( Ref Pic 4-7)


7. Allow The Paint To Fully Cure Over Night. If You Start Laying Clear Coat On The Paint Not Fully Cured It Will Crackle And You Will Have To Redo It

8. These Are Pictures On A Fully Painted & Cleared Visor (Ref Pic 8-10)


9. These Are Pictures Of Brad Ferrier Visor Installed (Ref Pic 11-13)


10. Sit Back And Enjoy Your Hard Work!  And Being Able To See Your Radio On A Sunny Day - Also Thanks To Brad Ferrier For Making This Piece